Hi everyone!
Thanks RecipeGirl for touching base over here and reminding me to get something up here.
It's been a challenging and busy month for me making it difficult to have much to post about here. Ski racing has been time consuming and somewhat emotional this year. Between challenging athletes and freezing cold conditions we've not gotten as much done this year as I would like. This week has been especially difficult. On Thursday February 14th tragedy hit the Team Summit family when the mother of one of my athletes died suddenly. Tomorrow is her funeral which I will attend. This is the second funeral I've had to attend related to some sort of teaching I do. Over 7 years ago I attended the funeral of a young boy that had been in my religious education class. He had fought and won the battle against brain cancer but succumbed a week after being declared cancer free to an infect from the shunt he had. The memories of Peter and his funeral have been raw this week as well.
Skiing on my own, however, has been fantastic! I had a great day with a bunch of people from skiing bulletin boards at Copper Mountain and explored areas I never get to see with the kids. I've skied with other friends and am really loving this season.
Food! I've honestly not done a whole lot special. Cooking has been only enough to survive and surely not inspired. Oh, I did visit Larkburger in Edwards (near Dish) and had the best burger of my life. A wonderful burger with Tillamook cheddar cheese and truffle aioli and truffle parmesan french fries. I think I'm spoiled for anything else!
I hope to post more in the near future but if I can't, I will be back when the season calms for me a bit.
Tuesday, February 19, 2008
Monday, January 14, 2008
Dish, again.
I know, you're all thinking I must be crazy for heading to Dish, yet again. I don't care! Incredible food, incredible service for an incredibly low price means you can't keep me away. Saturday I remembered to bring my camera with me and photographed not only my food but a few dishes leaving the kitchen and some of the kitchen as well. So I'll start with dinner descriptions and end with the photos! By the way, this may be out of order but at least all the dishes are describe and I always seem to be so excited to eat the dishes so pictures come after a couple of bites. Oops.
The Original - The same as below, serrano ham, manchego and sherry.
Tomato Bisque - Wow, this had a bite I didn't expect but it sure was welcomed!
Hawaiian Marlin - This marlin is sliced thin and smoke cured bacon style. Served with house made kim chi to balance the smoky fish. Wow.
White Truffled Pasta - Housemade pasta is served with a simple buttery sauce then white truffles are shaved generously on top and are perfectly showcased against the mellow pasta. Divine, absolutely divine.
Diver Sea Scallops - Seared and served with a lemon buerre blanc, pink grapefruit and fume de sel which is stored in oak chardonnay barrels so it takes on a bit of those flavors. I will definitely be making a dish with scallops and grapefruit at home as it was a wonderful contrast in the buttery scallop and the sweet-tart flavor of the grapefruit.
Roasted Chicken - Served in an open face saffron ravioli and an herbed cream broth. As I moved the sheet of pasta off the chicken and broth the aroma of the herbs hit me. And all I could do was inhale the beautiful smell and anticipate the first bite of pure comfort food.
Baby Iceburg Lettuce Wedge - Served with avocado, red onion and a creamy bacon dressing (with a bite of it's own). A nice refreshing break between rich dishes!
Beef Short Ribs - These had been braised for nearly 12 hours and literally fell apart as my fork touched them in the slightest. They were served with organic roasted carrots and a light coffee glaze with microgreens.
Churros - Yes, you read that right, churros. I wasn't excited about these until I started seeing them pass by me through the night (I was sitting right next to where the servers pick up food to take to other tables) and kept watching that little dish of dark chocolate ganache dipping sauce pass by. These were crispy on the outside and coated with cinnamon and sugar then warm and doughy and tender on the inside. Dipped in chocolate, they were pure heaven.
Buttermilk Cake - Kevin (the sous chef) couldn't decide which dessert was better so he served me both. This lemon buttermilk cake served with raspberry coulis is quite possibly the best non-chocolate dessert I've ever had the pleasure of enjoying.
Basically, this restaurant is bound for greatness. I see this being a destination spot, a place vacations are planned around. I only hope they'll still find a spot for me at their kitchen bar when they are booked to capacity months in advance. And I don't think it will be very long before that happens. In fact, I've already got my reservation for 7 people 2 months from today.


First ski race of the season!
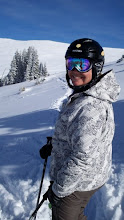
For those of you who don't know I coach ski racing for Team Summit at Copper Mountain. The last two seasons I've had our 5 and 6 year olds which has been so much fun. On Saturday we had our first race of the season at Breckenridge. Race days are chaotic and stressful for all involved but most especially the coaches and parents. At this age the kids just do what we tell them too! Today I took leadership of all of our Y7 (5 & 6 year old) girls, all 14 of them and made sure they did their 2 course inspections, got to the start and down to their speedsuits, did their 2 races and got lunch in there as well. I also had 2 other coaches and 2 parents assisting me. I am so very proud of all of these girls as well and their boy teammates who were being looked over by other coaches for the day. They all tried hard and as they know is my first rule, had fun. Ask any of them. The first rule on my team is to have fun. Below is a photo of some of the girls hanging out in the lodge after the second race.


Monday, December 31, 2007
On the morning follwing the meal at the Gold Hill I awakened at sunrise to go skiing. When I came up the stairs to start the coffee and check weather reports I was greeted by this magnificent site.

For Christmas Eve I joined my aunt and uncle for our family dinner with a total of 17 of us. It was a wonderful evening of family and friends and good food. I made Bon Appetit's Chocolate Candy Cane Sandwich Cookies which were well received by all. (Sorry it's blurry!)
Chocolate Candy Cane Cookies from Bon Appetit December 2005
Peppermint buttercream is sandwiched between homemade chocolate cookies; then the sandwiches are rolled in crushed candy canes.
Servings: Makes about 18 sandwich cookies.
subscribe to Bon Appétit
Ingredients
Cookies
1 3/4 cups all purpose flour
1/2 cup unsweetened cocoa powder (preferably Dutch-process)
1/4 teaspoon salt
1 cup sugar
3/4 cup (1 1/2 sticks) unsalted butter, room temperature
1 large egg
Filling
1 cup plus 2 tablespoons powdered sugar
3/4 cup (1 1/2 sticks) unsalted butter, room temperature
3/4 teaspoon peppermint extract
2 drops (or more) red food coloring
1/2 cup crushed red-and-white-striped candy canes or hard peppermint candies (about 4 ounces)
Preparation
For cookies:
Whisk flour, cocoa, and salt in medium bowl to blend. Using electric mixer, beat sugar and butter in large bowl until well blended. Beat in egg. Add dry ingredients; beat until blended. Refrigerate dough 1 hour.
Preheat oven to 350°F. Line 2 baking sheets with parchment paper. Scoop out dough by level tablespoonfuls, then roll into smooth balls. Place balls on prepared baking sheets, spacing about 2 inches apart. Using bottom of glass or hands, flatten each ball to 2-inch round (edges will crack). Bake until cookies no longer look wet and small indentation appears when tops of cookies are lightly touched with fingers, about 11 minutes (do not overbake or cookies will become too crisp). Cool on sheet 5 minutes. Transfer chocolate cookies to racks and cool completely.
For filling:
Using electric mixer, beat powdered sugar and butter in medium bowl until well blended. Add peppermint extract and 2 drops food coloring. Beat until light pink and well blended, adding more food coloring by dropfuls if darker pink color is desired. Spread 2 generous teaspoons filling evenly over flat side of 1 cookie to edges; top with another cookie, flat side down, pressing gently to adhere. Repeat with remaining cookies and peppermint filling.
Place crushed candy canes on plate. Roll edges of cookie sandwiches in crushed candies (candies will adhere to filling). (Cookie sandwiches can be made ahead. Store in single layer in airtight container at room temperature up to 3 days or freeze up to 2 weeks.)

For Christmas Eve I joined my aunt and uncle for our family dinner with a total of 17 of us. It was a wonderful evening of family and friends and good food. I made Bon Appetit's Chocolate Candy Cane Sandwich Cookies which were well received by all. (Sorry it's blurry!)

Chocolate Candy Cane Cookies from Bon Appetit December 2005
Peppermint buttercream is sandwiched between homemade chocolate cookies; then the sandwiches are rolled in crushed candy canes.
Servings: Makes about 18 sandwich cookies.
subscribe to Bon Appétit
Ingredients
Cookies
1 3/4 cups all purpose flour
1/2 cup unsweetened cocoa powder (preferably Dutch-process)
1/4 teaspoon salt
1 cup sugar
3/4 cup (1 1/2 sticks) unsalted butter, room temperature
1 large egg
Filling
1 cup plus 2 tablespoons powdered sugar
3/4 cup (1 1/2 sticks) unsalted butter, room temperature
3/4 teaspoon peppermint extract
2 drops (or more) red food coloring
1/2 cup crushed red-and-white-striped candy canes or hard peppermint candies (about 4 ounces)
Preparation
For cookies:
Whisk flour, cocoa, and salt in medium bowl to blend. Using electric mixer, beat sugar and butter in large bowl until well blended. Beat in egg. Add dry ingredients; beat until blended. Refrigerate dough 1 hour.
Preheat oven to 350°F. Line 2 baking sheets with parchment paper. Scoop out dough by level tablespoonfuls, then roll into smooth balls. Place balls on prepared baking sheets, spacing about 2 inches apart. Using bottom of glass or hands, flatten each ball to 2-inch round (edges will crack). Bake until cookies no longer look wet and small indentation appears when tops of cookies are lightly touched with fingers, about 11 minutes (do not overbake or cookies will become too crisp). Cool on sheet 5 minutes. Transfer chocolate cookies to racks and cool completely.
For filling:
Using electric mixer, beat powdered sugar and butter in medium bowl until well blended. Add peppermint extract and 2 drops food coloring. Beat until light pink and well blended, adding more food coloring by dropfuls if darker pink color is desired. Spread 2 generous teaspoons filling evenly over flat side of 1 cookie to edges; top with another cookie, flat side down, pressing gently to adhere. Repeat with remaining cookies and peppermint filling.
Place crushed candy canes on plate. Roll edges of cookie sandwiches in crushed candies (candies will adhere to filling). (Cookie sandwiches can be made ahead. Store in single layer in airtight container at room temperature up to 3 days or freeze up to 2 weeks.)
Gold Hill Inn
I'm alive, really I am. Between traveling back and forth to Boulder for Christmas festivities and coaching and work I've not done very well keeping up here. So, here's one big post to cover the last week and a half.
First, on Saturday December 23rd I was invited to join my aunt, uncle and gramma Jane and their friends at Gold Hill Inn for dinner preceded by drinks at the Sinners' cabin across the street. The in is in the tiny town of Gold Hill just a few miles outside of Boulder. However, in those few miles you climb, dramatically and top out around 9000 feet in elevation and drive a two-lane windy mountain road that is icy and snowy and scary. After reaching the top we were shown into the lovely cabin stocked with all sorts of Boulder memorabilia and warmed by a wood stove.

Next, we walked across the street to the inn to enjoy a 6 course meal. I chose the Raspberry Borscht for my soup and the Stuffed Smoked Trout for my entree, both of which were delightful. Although this is not the favorite of my meals in the Boulder area, I do believe the experience is worth it. What a wonderful old building to enjoy a meal in.

Saturday, December 22, 2007
New ski boots...
Last winter I accidentally melted my ski boots a bit. Not to the point that they were unusable but definitely damaged them. In addition, in a fairly typical move I'd bought them about a size too big so as they packed out I had far too much room to move about in them. My final straw was skiing powder in Vail a couple of weeks ago. I was moving all over in the boots causing so little control over my turns that I was hurting, big time both physically and in my skiing. So, at that time I decided I needed new boots.
Step in a wonderful employer who was extremely generous in a year end bonus and a professional discount and I decided I couldn't pass up a chance to have custom ski boots made. Surefoot has experience boot fitters, custom liners and custom orthotics with computerized footbed scans and they have locations at the base of most of the mountains that I ski where they'll do lifetime adjustments as needed. A week ago today I walked in for quite an experience.
I wish I'd had my camera with me to photograph the experience but unfortunately did not. They first do a computerized scan of your foot bed and mill a custom orthotic for you. Next up, based on that scan they pick out a boot that will fit your foot best. I ended up with a Tecnica Diablo boot. Once the orthotic is ready it is inserted in a liner that is yet to be padded and then insert it in the boot shell (minus the stock liner) with all sorts of plastic tubing coming out of the liner. The boot is manhandled with your foot inside and you're thinking "This hurts. Big time!" Then you are asked to head over to a specially designed platform. They prepare a special chemical foam that will be inserted into the boot sections via the plastic tubing and instruct you on how to press your foot into the liner to provide the most accurate mold. And they start filling. And you are ready to scream in pain until finally you just loose feeling in your feet. After they are filled you stand there for 5 minutes waiting for the foam to cure.
Once cured they tell you to head back over to the stool where they can work on the boot some more. Only you can barely walk and they laugh as they say that most people crawl there way up to the stool. Great. At this point I'm thinking "I'm paying how much for you to torture my poor feet and you say this is going to feel good to ski in?"
They remove the boot and disappear into the back room to "clean it up" and reappear to put the boot back on your feet. At that very moment I was thinking "This is gonna hurt, I don't think I can do this right now" as they slide it back on. And, all of the sudden you feel like your foot is being hugged like a perfectly fit glove on your hand.
Although I've only skied a couple of runs in my new custom boots I am beyond excited to put them to work tomorrow. Take a look at the top view and notice how unsymmetrical the tongues of the liners are, just to demonstrate how custom they are! And if you need new boots, head over to Surefoot at Copper Mountain and ask for Winnie, she'll torture you with a smile but in the end it will all be worth it!


Tuesday, December 18, 2007
I'm still getting used to this!
Well, on Sunday I made a tried and true recipe but completely forgot to take a picture of it. Oops. I promise I'll try to do better. Quinoa is a fantastic grain that I started using a few months ago. It has one of the highest amounts of protein in a grain so it lends itself to vegetarian applications well. Here's the recipe I used this time.
Quinoa Salad with Black Beans and Sweet Potatoes - from Women's Health
Ingredients
1/2 cup quinoa
1 tablespoon olive oil
1 medium sweet potato, peeled and diced
1 scallion, thinly sliced
1/4 teaspoon dried red chile flakes
1 cup water (I used FF/LS chicken broth)
1/2 teaspoon salt
3/4 cup canned black beans, drained and thoroughly rinsed
juice of one lime
2 tablespoon chopped fresh cilantro
Instructions
1. Place quinoa in a small-mesh sieve and rinse thoroughly.
2. Heat oil over medium-high heat in a medium skillet (be sure you have a tight-fitting lid for the skillet).
3. Add sweet potato, scallion, and chile and saute until fragrant, about 2 minutes.
4. Add quinoa; toast for 2 minutes.
5. Add water (broth) and salt.
6. Bring to a boil, reduce heat to medium low, and cover. Simmer until quinoa and sweet potato are tender, about 10 to 12 minutes.
7. If liquid remains unabsorbed in the pan, raise heat to high and cook for 2 minutes until it boils off.
8. Stir in black beans and lime juice and cilantro.
9. Serve warm or chilled.
Subscribe to:
Posts (Atom)